

Closet on the Go: Stylebook App Review
What is the Stylebook App?
Stylebook is the answer to life you wish you had after you watched Clueless for the first time.
Wait. Confession time, am I the only one who didn’t fall madly in love with Clueless?!
Regardless, her closet and outfit generator were goals. I mean that’s the worst part about getting dressed: figuring out what to wear.
Stylebook isn’t just there to demonstrate how it can create rad outfits from your closet, it’s main goal is to help you organize your closet and track what you wear. Seems nerdy on the surface. And it is.
But, tracking what you wear and what you own might just lead you to cultivating that personal style you crave so badly. When we pick out what to wear or what to buy, we aren’t often thinking beyond a surface level of “This looks cozy and I can wrap up in this cardigan” or “But I don’t own a bright purple blouse yet! I needdddd it!”
When you start getting into the nitty gritty of everything you own, what the sizes are, what brands you buy from most and then which brands you actually end up wearing the most, and seeing what you wear or don’t wear, well, you see what your style might be at its core.
Or, if you don’t see your style, you can see what’s missing and what you for sure don’t like.
Doing all that in your brain or on a scratch pad in your closet is a quick way to forget and continue on the style road you were on. Stylebook makes it easy and dare I say, fun, to track and organize your wardrobe, with the added bonus of helping you generate outfits a la Cher.
How much does it cost?
Yeah, Stylebook isn’t free. But it isn’t expensive either. And, it’s not a subscription for a month or a year. Once you download it, you have it on any and all devices you have. Sadly, it is only on iOS for right now. Don’t worry, android users. Check out this or this to find a similar app.
Price: $3.99
How does it work?
Okay, there are 5 main components to the Stylebook app.
-
Closet
-
Looks & Packing Lists
-
Calendar
-
Style Stats
Closet
This is where you will add in all of your items. You upload pictures of your items and then categorize them by type and subtype. So, a blouse you would put into the “Tops” category and then perhaps the “Sleeveless” sub-category. You can change and add as many categories as you want!

To actually upload something into your closet, you have two options.
-
You take pictures of each item in your closet.
-
You use the “Import from Web” feature to use product photos you can find on Google.
Uploading Your Own Pictures
You’re going to need a sheet or a solid colored background. You have to manually upload everyyyything in your closet. This is the sucky, time consuming part. Like, it takes a LOT of time. I have a pretty small closet and it took me 4ish hours and an aching back.
To make it a bit faster, I recommend taking all of your photos at once and NOT taking them in the app. If you take them in the app, you’ll have to edit, categorize, and add any details between taking every photo. I prefer to bulk batch things so you can get in a groove. It’s easier to upload all of the photos from your camera and then categorize them.
Once you upload a photo, you can remove the background to get those flawless product style pictures with no background. I have a love/hate relationship with this feature.
WHEN it works, it works really well. But, the reality is most of the time if you’re super picky and want every last bit of the background to disappear, you’re going to spend a lot of time zooming in and removing the background. If you’re okay with a couple of imperfections, you can just use the slider to adjust how much of the background is removed.
Pro tip: Use a white sheet for everything dark or medium colored and a black sheet for anything white or lightly colored. Basically, you want as high of a contrast as possible between your background and your piece of clothing to get the best background removal without extra manual editing.

Import Pictures from Web
This feature is hands down the easiest, quickest, and will give you the best pictures.
-
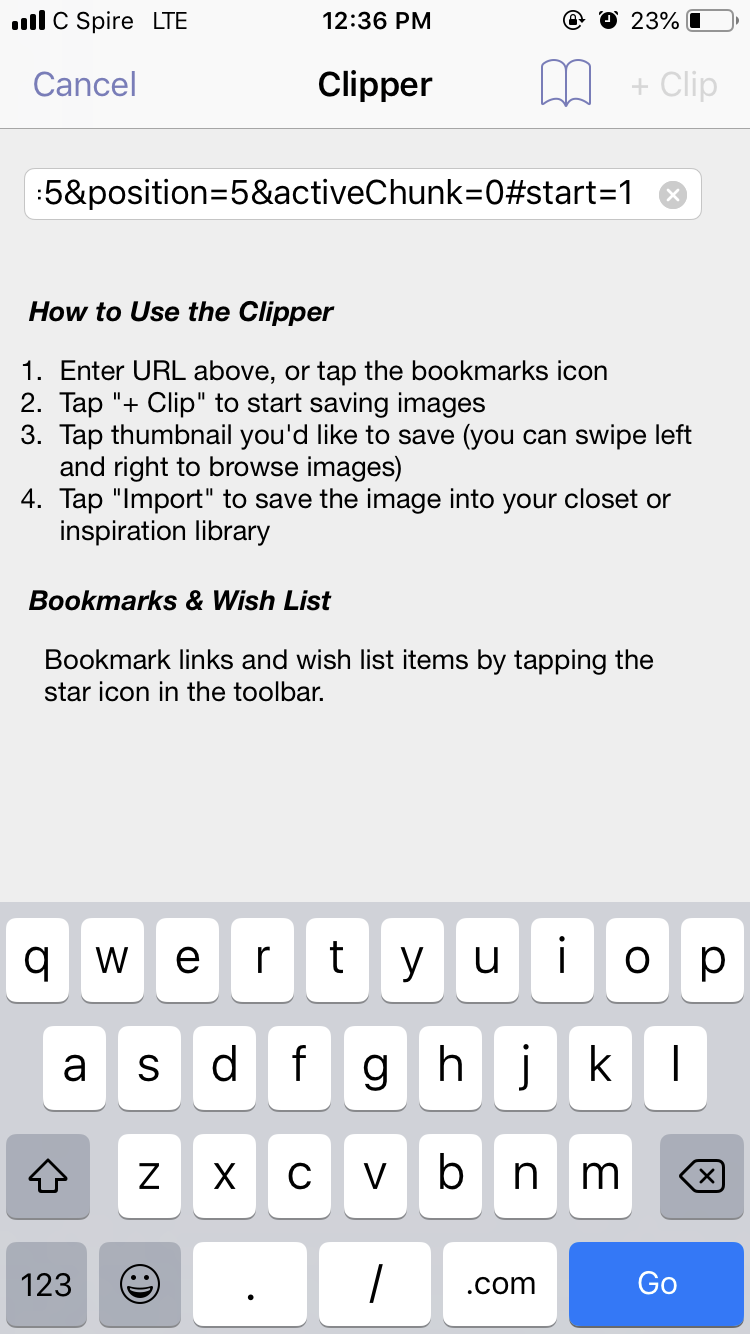
When you go to import something to your closet, instead of choosing a photo from your camera roll you’ll choose “Import from Web”
-
Then, the app will bring up a screen where you can paste the url where you found the item. This can be the brand’s site, a reseller, google. Anywhere you find the picture, you can import it.
-
Once you paste your URL it will bring up the site within Stylebook and let you “Clip” the image you want.
-
Choose the image you want, and then you follow the same process of removing the background and adding details.
I like using this feature because I can find much better pictures than the ones I take myself, and they’re usually lit very well, which means you rarely have to remove the background manually.
This may not work if you have a lot of older items in your closet, but I would suggest doing this for anything new you end up buying.
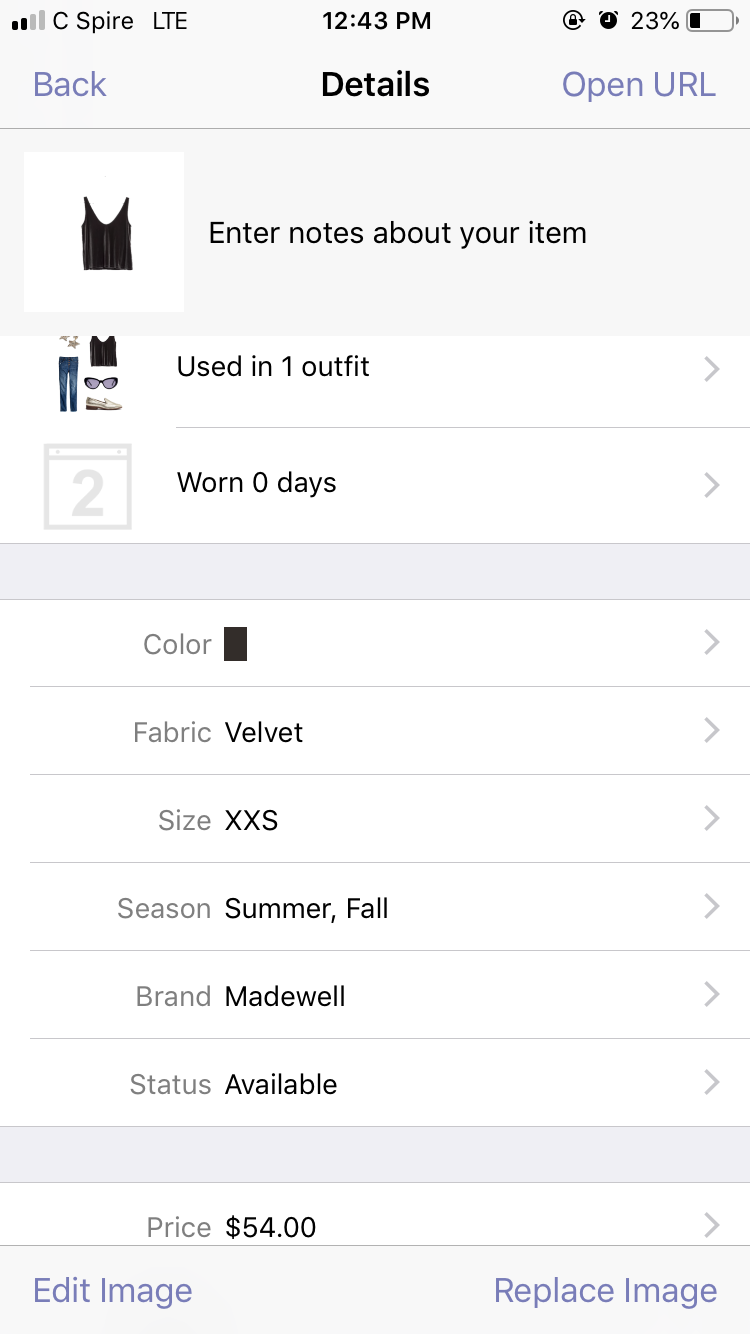
After the photo is uploaded, you have the option (but not requirement) to add details like brand, season, fabric type, size, etc. These details are not necessary, but very helpful if you want some analytics on your closet and the types of things you love most.
That’s all there is to the closet. You upload an image of each item in your closet (clothing, shoes, accessories, etc), remove the background, and then add some details about each item if you’d like. It’s very simple and straightforward!
Looks & Packing Lists
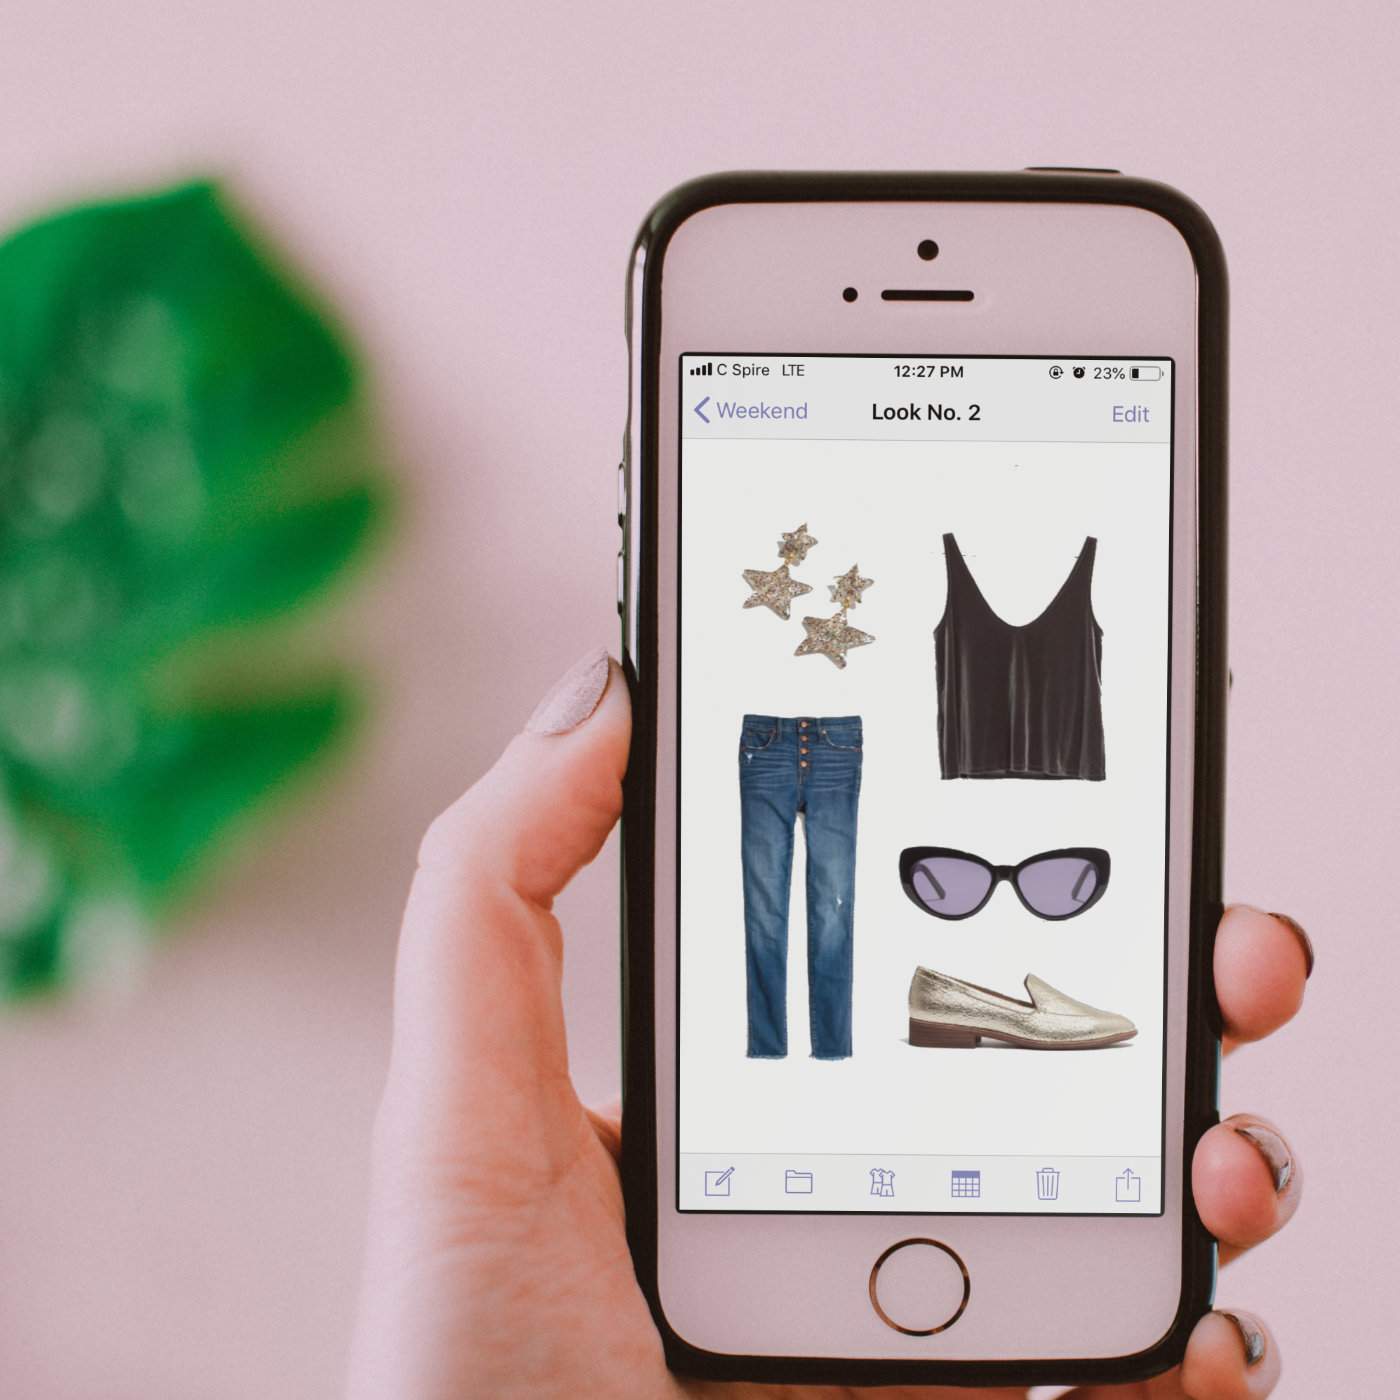
While Looks is separate from Packing Lists, the two features are pretty similar. In Looks, you can add items from your closet to categories of looks.
For example, you can have a category of Looks called “Weekend”. In this category you add clothing from your closet to make outfits.
I made a look for the weekend with one of my favorite pairs of jeans and cozy sweaters and threw in a purse for good measure. It’s not a magazine quality layout, but you can rearrange and layer the items as you wish. One sucky part is that you can make the items bigger, but you can’t make them smaller. So, that purse looks disproportionately huge compared to my sweater and jeans.
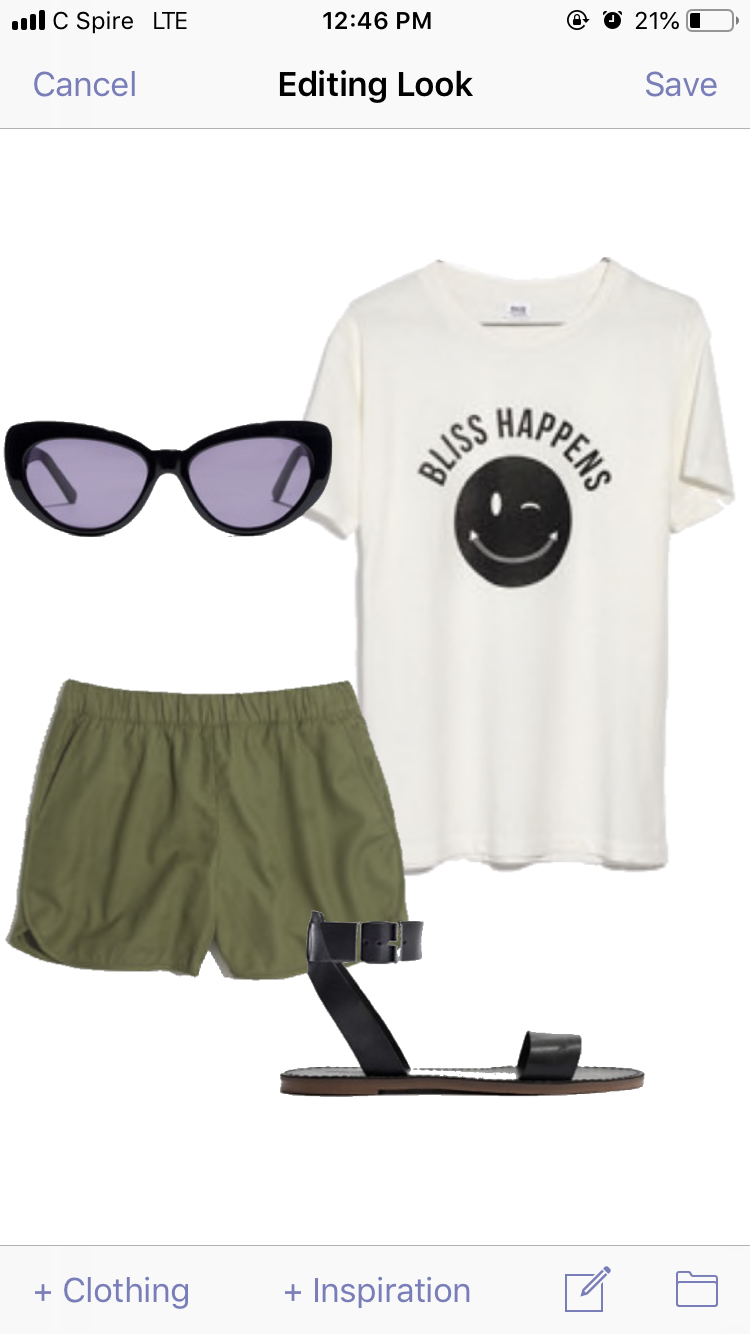
Bonus Feature: Outfit shuffle creates new outfits for you! Takes the work out of you creating your own outfits and suggest stuff you haven’t come up with yet.
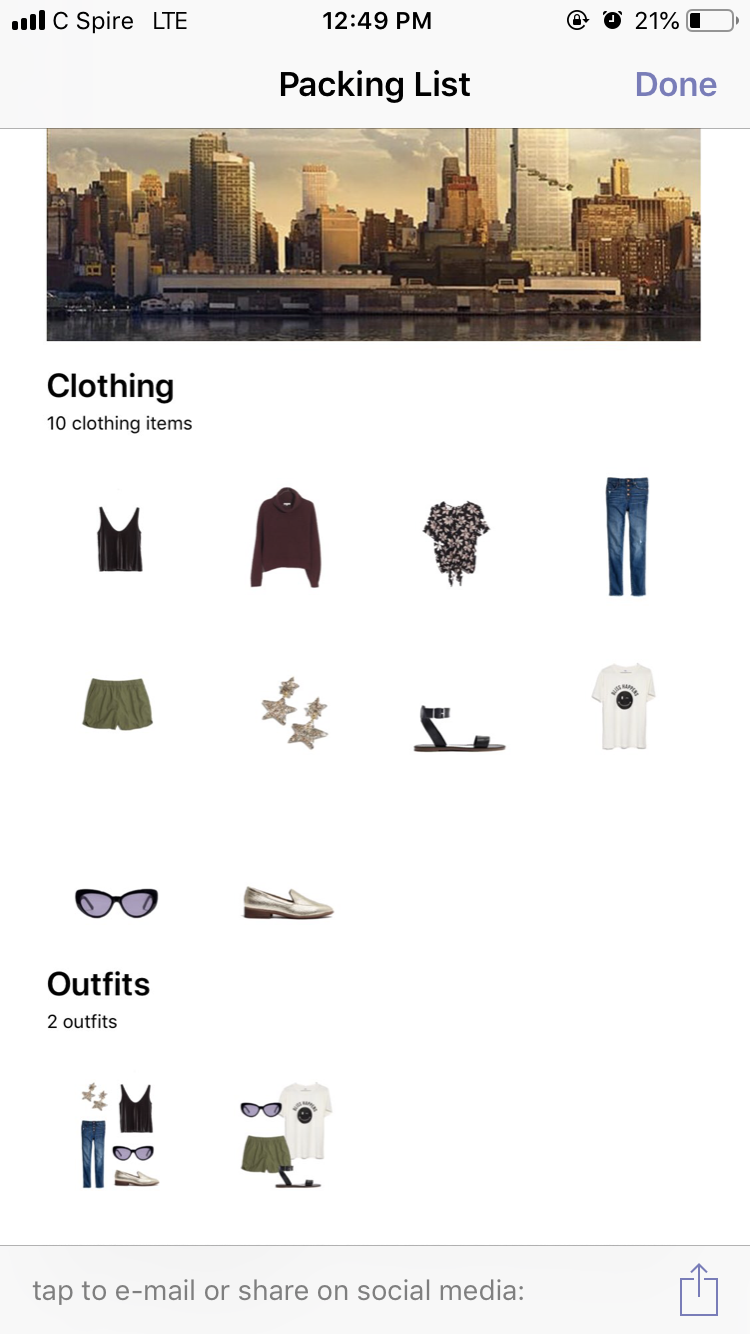
Packing Lists is used kind of the same way. You’re going on a vacation or a work trip, and you want to know what you can pack and how many ways you can wear it, because who uses more than a carryon anymore?!
So, for my imaginary trip to New York that will only be three hours and need one outfit, I added in the pieces of clothing I wanted. Then, you add Looks (outfits). This is where the whole Packing Lists feature doesn’t work that well. You can only pull Looks you’ve already made, you can’t make new ones with only the items in your Packing List. This kind of defeats the purpose.
Since you can create as many categories of Looks as you want, I suggest using that in place of the Packing Lists feature. Using both will just double the work and the confusion.
2019 Update: One of the Founders of Stylebook reached out to me and let me know that the Packing List feature only uses Looks (aka outfits) so that you can start your list on outfits that already look good together instead of just packing willy nilly. I never thought of it that way, but it makes sense! I usually pack outfits that are tried and true when I go on vacation, so thanks Stylebook for thinking that through!
However! There is one extremelyyyy cool feature that allows you to print your packing list with the actual pictures of the items you should pack and the outfits you can wear. This would be really neat to put in your suitcase to help you remember the outfits or so you don’t forget anything when you’re packing.
Calendar
This is a small but mighty feature in the Stylebook app. The Calendar is where you are going to log your outfits, and this in turn will give you style statistics on how much you wear things, the cost per wear, etc.
You have the option to add individual pieces of clothing or Looks you’ve already created for reference. Each month of the calendar will fill up with a little icon of what you wore so you can see the item and how many days you’ve logged your outfits.
Do note that it won’t show every piece of clothing in the outfit you wore. The calendar box will fill with whatever piece of clothing you put in first for that day.
Overall, this is a pretty handy and bug-free feature!

Style Stats
This is the nitty gritty of the app. You may never touch this section, but if you take a look after uploading some outfits you’ve worn you’ll see some pretty neat statistics.
My Favorite Stats:
-
Total Closet Value – this comes from the price you put each item in your closet cost
-
Item Count – number of items in your closet
-
Never Used
-
Cost Per Wear – the cost of an item divided by how many times you’ve worn it
-
Outfits Created
-
Top Color
-
Top Fabric
-
Top Size
-
Top Brand
Final Impression
There are a few cons and little bugs in the Stylebook app, but nothing that would stop me from buying it out. The price ($3.99) is so low that I think everyone should try it and see if it’s for them. You might find out that you don’t like tracking your wardrobe and want something easier or that you want even more control or that Stylebook is just right for you.
I think, ultimately, Stylebook is the app you should start with if you’re even remotely interested in having a digital closet and creating looks. I know I will definitely be using it for a few more months. Those stats are as valuable as Chanel!


I’m not sure if you’ve worked it out but you can make items smaller by double tapping the item > manual resize > them just drag the slider left to make smaller. I love this app and I’ve been using it for a year straight. The only change I would make if being able to see stats by category eg see which shoes you paid the most for, or wore the least etc.